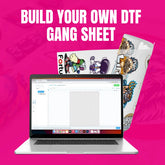
Build Your Own Gang Sheet: A Guide to Custom DTF Printing
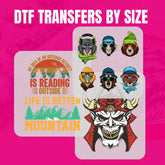
Custom printing has never been more simple, and DTF printing lets you create vivid, long-lasting patterns for any cloth. Learning how to build your own gang sheet is crucial, though, if you want to maximize your DTF transfer sheets. A DTF gang sheet allows you to fit multiple designs onto a single sheet, maximizing efficiency and reducing waste. Whether you run a small business or print for personal projects, this guide will carefully walk you through the process to guarantee consistently excellent outcomes.
Step 1: Preparing Your Designs
Gathering and setting up your designs comes first in creating your gang sheet. DTF heat transfers call for high-resolution graphics, so ensure your artwork is at least 300 DPI. This guarantees your final printouts are sharp and clear and helps avoid pixelation. Though free tools like GIMP can also be useful, many experts utilize programs like Adobe Illustrator or Photoshop.
Look also at the color settings. Most DTF printers run in CMYK mode, so changing your designs from RGB guarantees correct color reproduction. Once they are ready, save your designs in PNG or TIFF format with a transparent background for optimum results.
Step 2: Setting Up the Canvas
Open your design software to create a canvas for your DTF transfer sheets. Although most sheets are 24 inches wide and vary in length, always ask your provider for exactly the size. Starting with the right proportions guarantees that your designs fit exactly without needless scaling.
Start setting your pictures on the sheet. Use as much space as feasible without crossing over the designs. Consider it a puzzle; turn and change the images to maximize the given space. Maintaining a tiny gap between every design will facilitate later cutting and application.
Step 3: Arranging and Optimizing Designs
Building your gang sheet calls for effective layout design. While leaving too much room wastes material, overcrowding can make cutting difficult. Use your program's grid or alignment tools to get the best layout. Clustering designs closer together saves money and lowers extra film use.
Make sure none of the elements are cut off and that all of them are in line. If you print logos or lettering, ensure the text is legible and that little details won't fade during transfer. Once you are happy with the layout, lock your design layers to prevent inadvertent movement.
Step 4: Final Checks Before Printing
Review once last before emailing your gang sheet for printing. Close-up on every design to examine transparency options, colors, and edge details. DTF transfers ready to press call for exact layering, so ensure no concealed objects can compromise the final print.
Examining print settings is also crucial. Print a small test copy on ordinary paper to check for clarity and alignment if possible. Certain expert DTF printing companies also offer preview tools to guarantee your final print meets expectations. Studies reveal that around thirty percent of misprints are caused by print alignment mistakes, so double-checking everything now helps to save materials and time.
Step 5: Printing and Application
Print once your gang sheet is complete. Make sure the printer settings match your file resolution and color profile, whether you outsource the work or use your own DTF printer. Good DTF transfer sheets will capture every detail hence consistency is mostly dependent on this.
Apply the adhesive powder uniformly and cure it as the manufacturer directs for the following printing. Press the drawings into cloth and follow the advised temperature—usually between 300 and 320°F—for 15 to 20 seconds. Peel the film once chilled to expose a vivid, long-lasting design. DTF transfers are better than conventional heat transfers as, with appropriate use, they resist over 50 washes without fading.
Conclusion
Custom printing transforms learning how to create your gang sheet. It permits better workflow, cost reductions, and effective utilization of materials. High-quality outcomes every time may be guaranteed by producing high-resolution designs, configuring the appropriate canvas size, maximizing layout, and doing last inspections. Learning this procedure will help your DTF printing to advance regardless of your degree of experience.
Ready to start printing? Visit DTF Transfer Art to explore high-quality DTF transfer sheets and printing solutions today!
- bulk printing
- custom apparel printing
- Custom clothing printing
- custom gangsheet
- Custom Gangsheets
- custom prints
- decal production
- decal transfer
- decal transfers
- Design preparation
- Digital printing
- Direct-to-Film Transfer
- DTF gangsheet
- DTF Heat Press
- DTF Printing
- dtf transfer
- dtf transfer art
- dtf transfer film
- dtf transfer instructions
- dtf transfer paper
- dtf transfer printer
- dtf transfer sheets
- dtf transfers near me
- dtf transfers ready to press
- dtf transfers wholesale
- DTF vs Screen Printing
- DTF vs Vinyl
- DTF vs. iron-on
- gangsheet printing
- heat press printing
- heat transfer decals
- heat transfer method
- hot peel DTF
- iron-on decals
- Printing companies
- Printing methods
- Quality printing
- Screen printing
- Transfer printing
- what is dtf transfer


